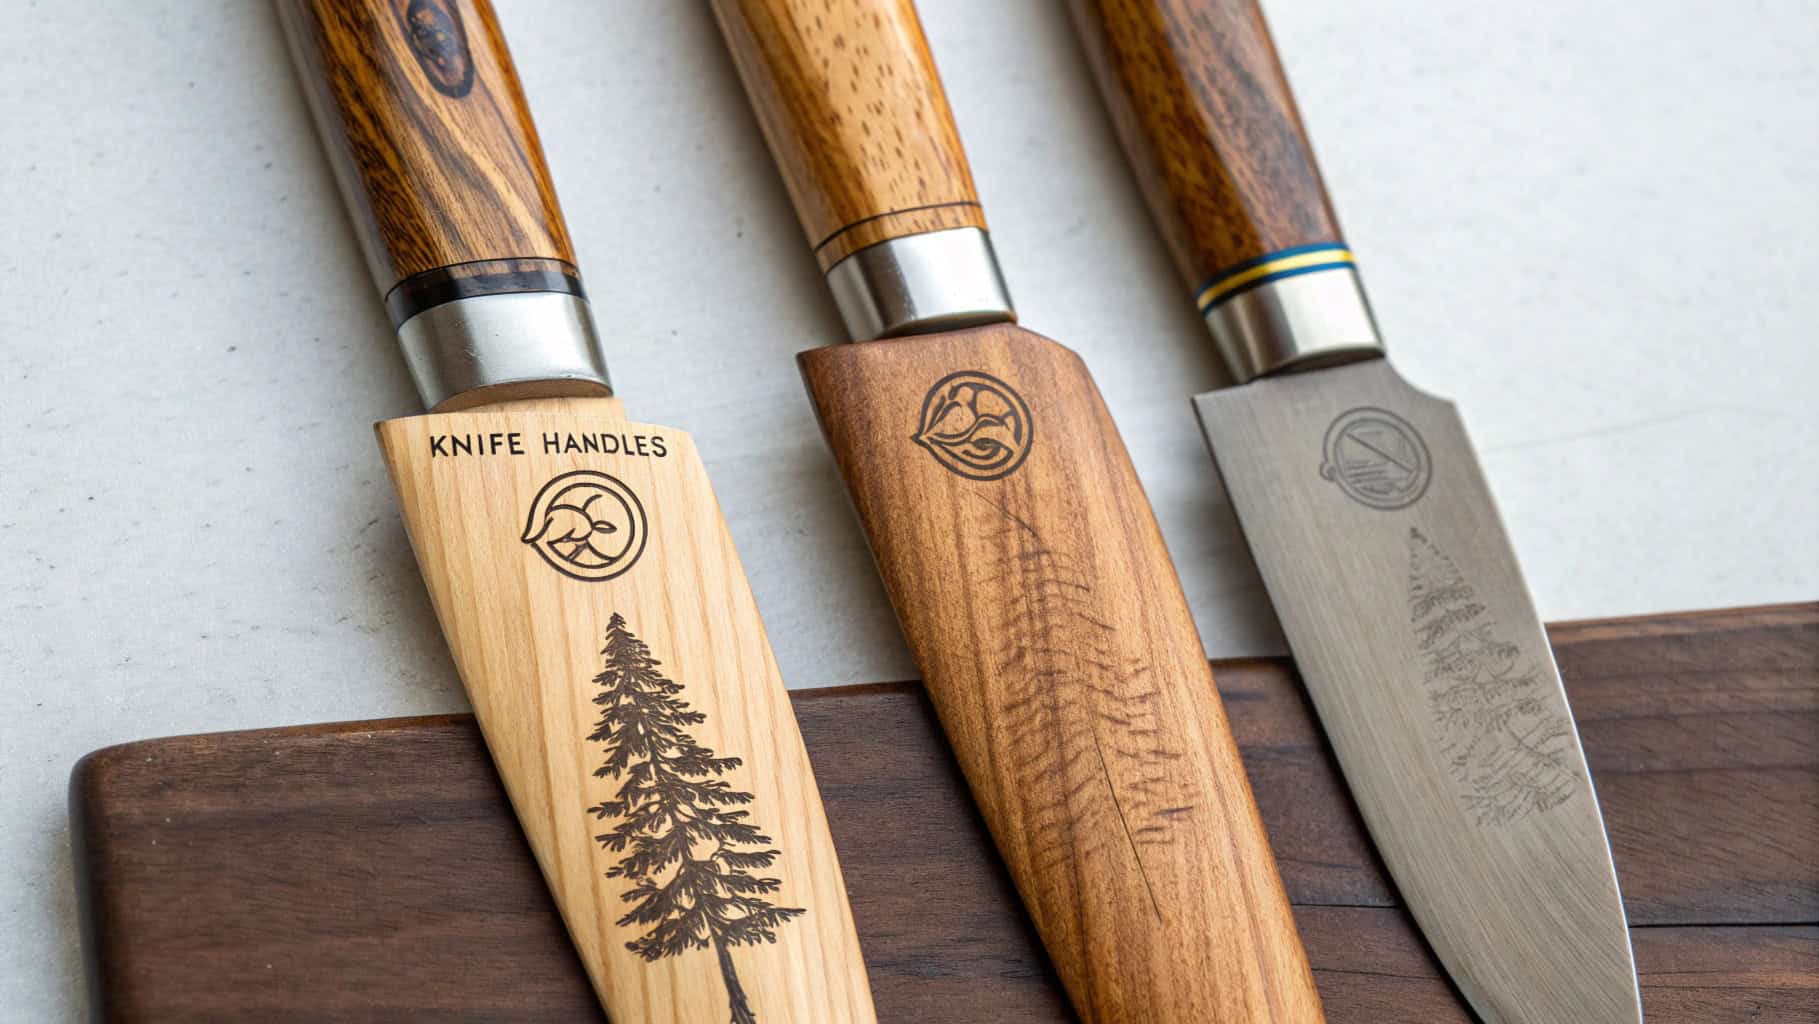
Have you ever held a knife and thought, “This could feel better”? A good knife handle isn’t just about how it looks—it’s about being comfortable, easy to control, and built to last. When you make the round knife handle yourself, you’re not just crafting a tool; you’re creating something special and personal. I enjoy making the round knife handles because it transforms a simple project into something unique and practical. Whether it’s for a chef’s knife or everyday use, shaping and finishing handles is incredibly rewarding. Let’s explore why making the round knife is such an enjoyable craft!
Key Takeaways
Pick strong materials like hardwood or treated wood for handles. This makes them last longer and feel good to use.
Use proper tools to shape and finish handles. Tools like files, sandpaper, and clamps help you work better and faster.
Stay safe while working. Always wear safety goggles and a dust mask to keep away dust and debris.
Keep your workspace neat and organized. A clean area saves time and helps you focus better.
Add unique designs or materials to your knife handles. Personal touches make them stand out and feel special.
Essential Materials and Tools for Round Knife Handles
Picking Strong Materials for Long-Lasting Handles
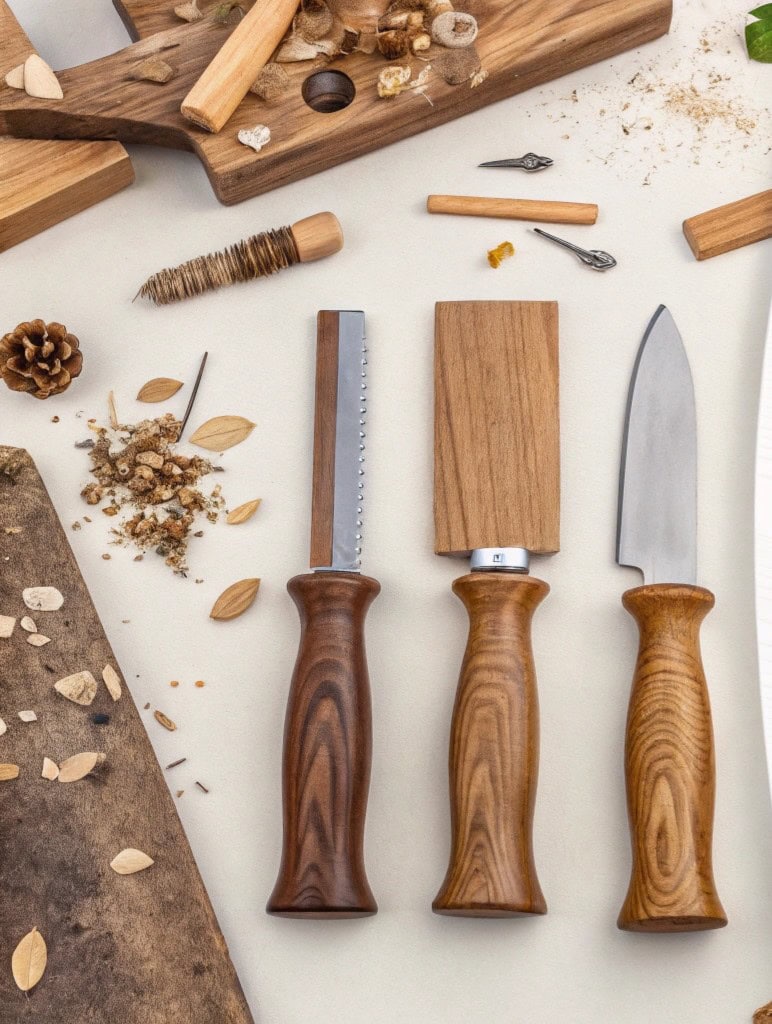
When making a knife handle, start with strong materials. The handle needs to last through daily use. Hardwoods like walnut or maple are great for wooden handles. They are sturdy, look nice, and feel good to hold. If you want modern options, try stabilized wood or micarta. These materials resist water and are very durable.
Pins are also important for attaching the handle. Brass or stainless steel pins work well for this. Brass pins are easy to use and give a classic look. For stronger knives, stainless steel pins are better. They are tough, flexible, and come in many sizes for different designs.
Tools You Need for Making Handles
To make a knife handle, you need the right tools. Files and rasps help shape the handle perfectly. Sandpaper smooths out rough spots. If you want to make handles faster, a CNC machine like the SYIL is helpful. It makes precise and consistent cuts for high-quality handles.
For cutting, use a bandsaw or scroll saw. These tools make cutting handle pieces simple. Clamps are also important to hold parts steady while you work. Using these tools saves time and makes your handle look better.
Staying Safe While Crafting Handles
Safety is very important when making knife handles. Always wear safety goggles to protect your eyes from flying bits. Use a dust mask when sanding to avoid breathing in dust. Gloves can stop cuts but should not make it hard to hold tools.
Handles that fit your hand well are safer to use. They reduce strain and give you better control of the knife. Stabilized wood is also safer because it lowers blade exposure during crafting. Studies show that good designs reduce muscle strain, so I always think about this when shaping handles.
Preparing Your Workspace for Efficiency
When I began making knife handles, I saw how helpful an organized workspace is. A clean, safe area saves time and makes crafting more fun. Here are some tips that worked well for me.
Safety is the most important thing. I keep a fire extinguisher close and remove flammable items. Good airflow is also key. Sanding can create dust, so I use a fan and a carbon monoxide detector to keep the air safe.
Bright lighting helps a lot. Shadows make it hard to see details. I use adjustable lights to see clearly while sanding or shaping. It really improves accuracy.
I organize tools into sections. Cutting tools go on one side, sanding tools on another. This setup reduces extra movement and keeps tools easy to grab. It feels like a small, well-planned workshop.
Pro Tip: Keep your workspace tidy. A clean area lowers accidents and helps you focus better.
By using these ideas, I’ve made my workspace safer and more efficient. Try it—you’ll see the difference quickly!
Step-by-Step Guide to Shaping Knife Handles
Measuring and Cutting Handle Blanks Accurately
When I start shaping a knife handle, I always focus on precision. Accurate measurements make a huge difference in the final product. To cut the handle shape, I use a ruler and calipers to ensure the blanks match the knife tang perfectly. Tight tolerances are key here. If the blanks are off, the handle won’t fit snugly, and the knife might feel awkward to use.
Here’s my step-by-step process:
Cut the handle blanks to the correct length using oak or another sturdy material.
Trace the tang outline onto the blanks.
Cut away excess material with a coping saw.
Refine the handle shape with a wood rasp for a closer fit.
I’ve learned that tools like coordinate measuring machines (CMMs) can verify tolerances for machine-ready blanks. While I don’t use one myself, it’s fascinating how they ensure dimensional accuracy. For me, careful measuring and cutting are enough to create a high-quality handle.
Tip: Double-check your measurements before cutting. It saves time and prevents mistakes.
Creating the Perfect Tang Slot
The tang slot is where the knife tang fits into the handle. Getting this part right is crucial for stability. I trace the tang onto the handle blanks and carve out the slot using a chisel or rotary tool. It’s important to keep the slot snug but not too tight. A loose fit can make the knife wobbly, while a tight fit might crack the handle during assembly.
I also drill holes for pins at this stage. Using the tang’s pre-drilled holes as a guide ensures perfect alignment. Pins add extra stability, especially for knives that see heavy use.
Pro Tip: Test the tang fit before gluing. Adjust the slot if needed to avoid issues later.
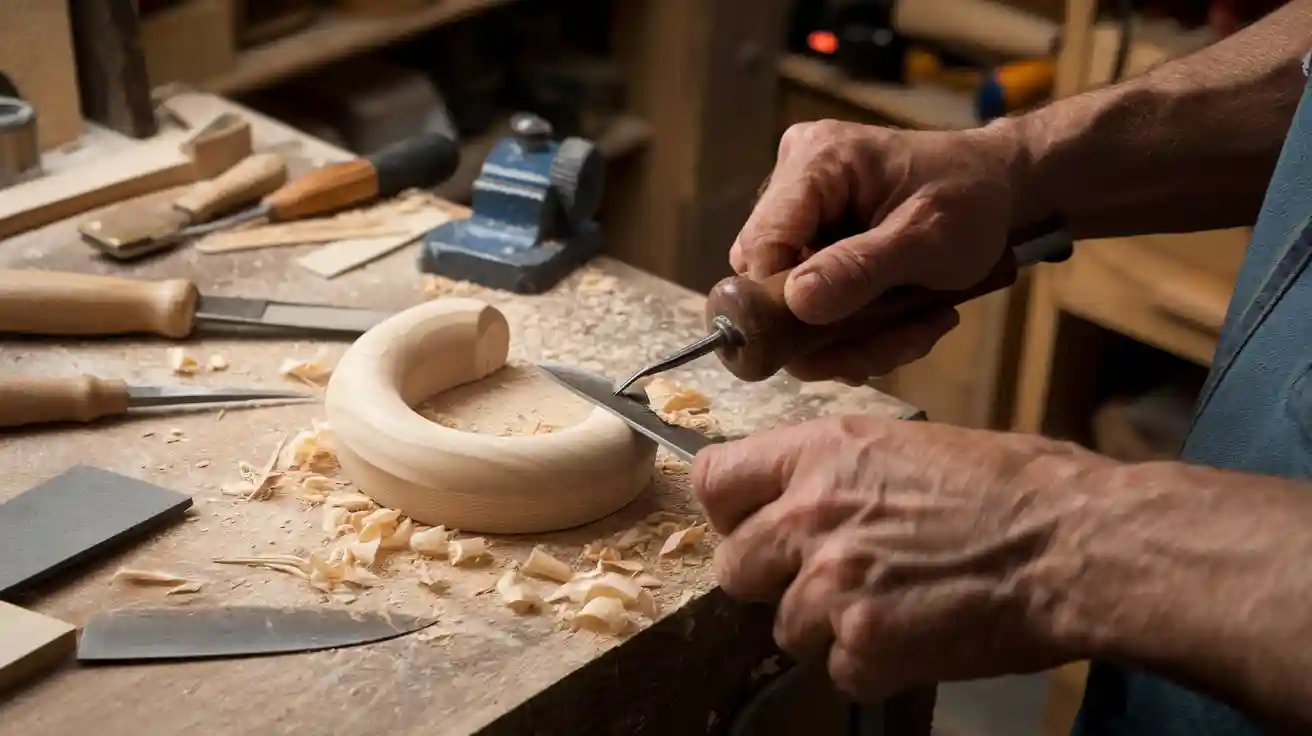
Ergonomic Shaping for Comfort and Grip
Shaping the handle for comfort is my favorite part. I think about how the knife will feel in the hand. A good handle shape should conform to the natural grip and reduce strain during use. I start by rounding the edges with a rasp and sandpaper. This creates a smooth, ergonomic design.
Studies show that ergonomic handles reduce wrist strain and improve efficiency. Lightweight materials and rounded shapes make a big difference. I aim for a balance between comfort and aesthetics. The handle should look great but also feel secure in the hand.
Callout: Don’t rush this step. Take your time to create a handle that feels just right.
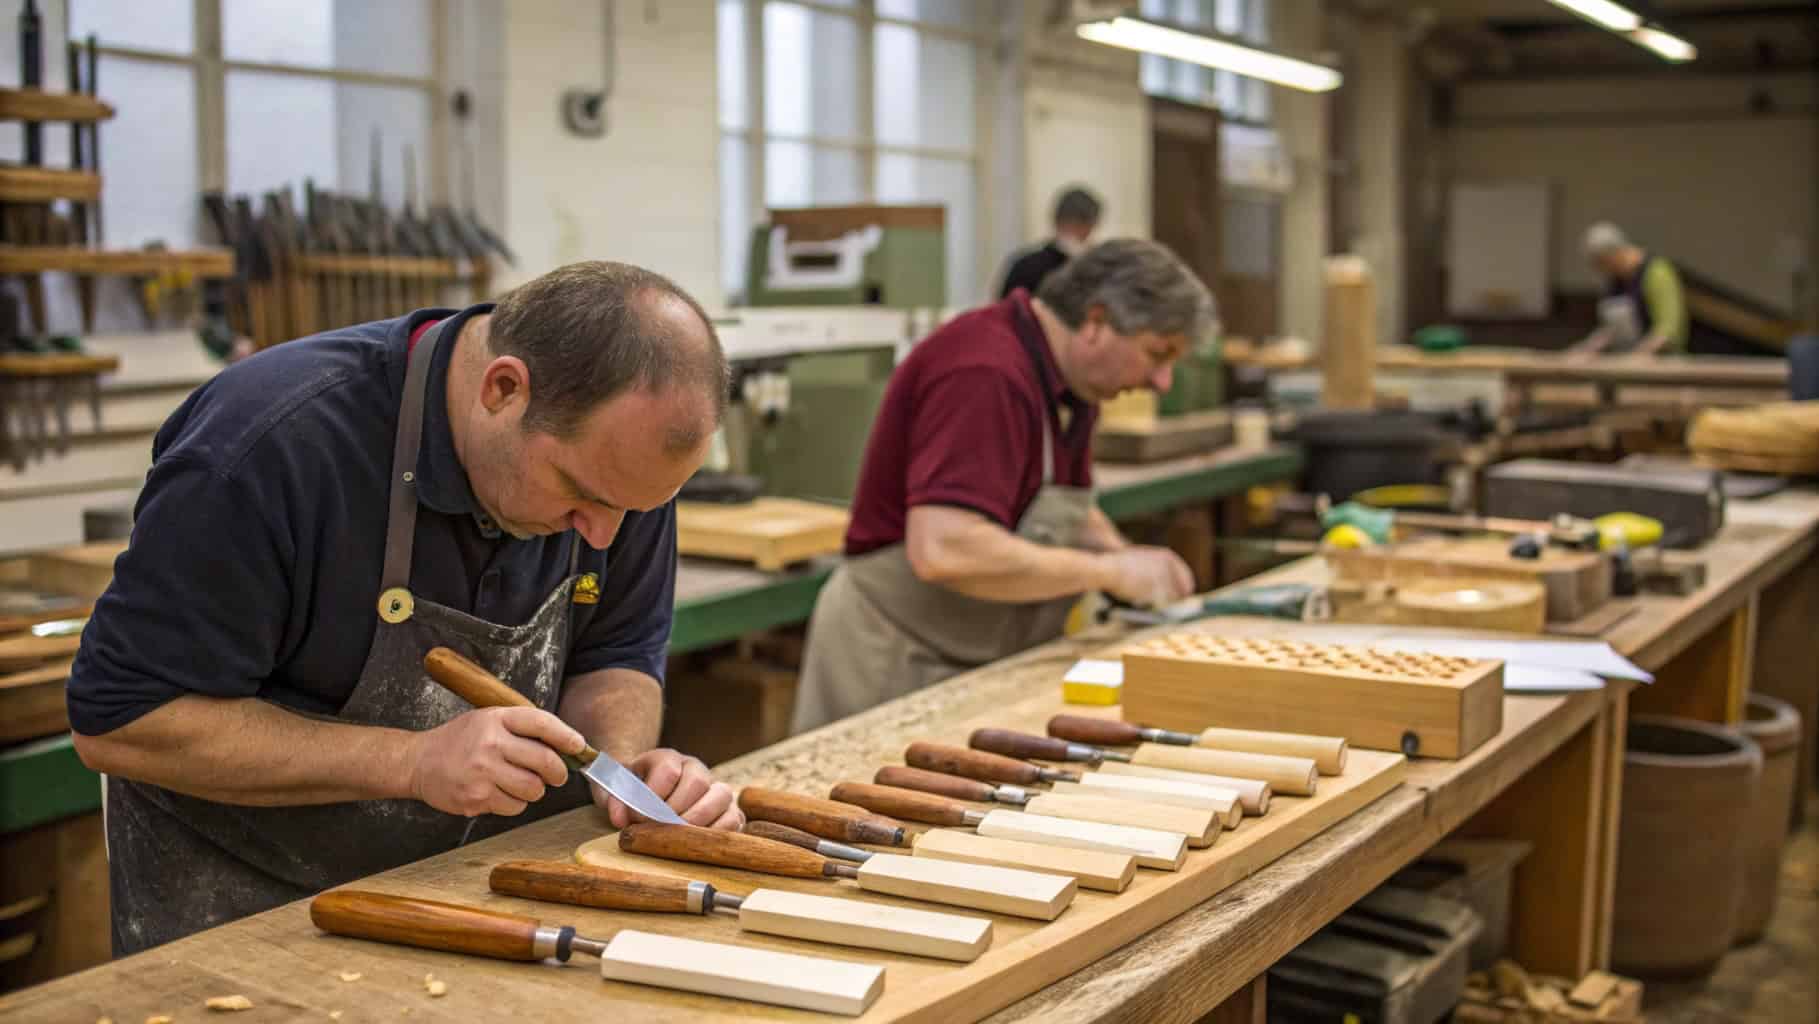
Tips for Achieving Consistent Shapes
When I first started making knife handles, getting consistent shapes felt like a challenge. But over time, I’ve picked up a few tricks that make the process much easier. Let me share what works for me.
Use Templates: I always start with a template. Tracing a pre-made design onto the handle blanks ensures every handle has the same basic shape. You can create your own template using cardboard or thin plywood. It’s a simple step, but it saves so much time.
Work in Stages: Instead of shaping the handle all at once, I break it into stages. First, I rough out the shape with a rasp or file. Then, I refine it with sandpaper. This step-by-step approach helps me stay in control and avoid over-shaping.
Check Symmetry Often: I stop frequently to check the handle from different angles. Holding it up to a light or using a small mirror helps me spot uneven areas. It’s easier to fix small issues early than to correct them later.
Pro Tip: Use a caliper to measure both sides of the handle. This tool ensures the thickness and curves are even.
Practice Patience: Rushing leads to mistakes. I’ve learned to take my time and enjoy the process. Consistency comes with practice, so don’t worry if your first few handles aren’t perfect.
By following these tips, I’ve been able to create handles that not only look great but also feel balanced and comfortable. Try them out, and you’ll see the difference in your work! 😊
Assembling the Knife Handle Securely

Techniques for Gluing the Tang
When it comes to securing the tang, preparation is everything. I always start by cleaning the tang with a jeweler's file to remove any old glue or debris. Then, I roughen the surface with coarse sandpaper. This step helps the adhesive bond better. For the glue, I prefer using a two-part epoxy. It’s strong, reliable, and perfect for custom knife handles.
Here’s my process:
Insert the first spacer, ensuring glue spreads evenly between the bolster and spacer.
Add the remaining spacers, checking that each layer is flush.
Fit the handle material snugly against the spacer stack.
Clamp everything tightly and let it cure.
I’ve found that adding a pin through the tang provides extra security. Just make sure the hole is slightly oversized for the pin stock. This allows the epoxy to fill the gaps and create a stronger bond.
Tip: Always check for gaps before the glue dries. A flush fit ensures the knife handle feels solid and durable.
Using Pins for Added Stability
Pins are a game-changer when you want to assemble and finish a knife handle securely. I usually use brass or stainless steel pins. Brass gives a classic look, while stainless steel offers extra strength. Aligning the tang with the handle is crucial here. A tight fit ensures the knife feels sturdy and performs well.
To install the pins, I drill holes through the handle and tang, using the tang’s pre-drilled holes as a guide. Then, I insert the pins and tap them gently into place. This step locks everything together. For heavy-duty knives, I sometimes add rivets. They’re not just decorative—they also improve the handle’s overall durability.
Pro Tip: Test the pin alignment before applying glue. It’s easier to fix mistakes early on.
Effective Clamping Methods
Clamping is the final step to ensure everything stays in place while the glue cures. I’ve tried several methods, but vacuum clamping stands out for its efficiency. It’s great for batch work, though it can be pricey for occasional users. For smaller projects, I use homemade clamps made from wood and screws. They’re simple, effective, and budget-friendly.
The key to good clamping is even pressure. I always check that the handle and tang are flush before tightening the clamps. Multiple cell chucks are also handy for holding different-sized components. They’re perfect for amateur makers like me who work on small handles.
Callout: Don’t rush the curing process. Let the epoxy set fully to avoid weak bonds.
Ensuring Proper Curing Time
When it comes to curing the glue, patience is your best friend. I’ve learned the hard way that rushing this step can ruin all the hard work. The glue needs time to set properly so the handle stays secure and durable.
How Long Should You Wait?
Most epoxies need at least 24 hours to cure fully. Some quick-setting adhesives might promise faster results, but I avoid them for knife handles. They don’t offer the same strength as slow-curing options. I always check the manufacturer’s instructions on the glue packaging. It’s the easiest way to know the exact curing time.
Tip: If you’re unsure, give it an extra day. It’s better to wait longer than risk a weak bond.
Creating the Right Environment
Temperature and humidity play a big role in curing. I make sure my workspace stays between 70°F and 80°F. If it’s too cold, the glue takes longer to cure. Too much humidity can weaken the bond. A small heater or dehumidifier can help maintain the ideal conditions.
I also avoid moving or disturbing the clamped handle during curing. Even a slight shift can create gaps in the glue. To keep everything stable, I use clamps with rubber pads. They hold the handle securely without damaging the surface.
Testing the Bond
After curing, I gently test the handle to make sure it’s solid. I press on the edges and check for any movement. If the handle feels loose, I know something went wrong. In that case, I remove the handle and start over.
Callout: Don’t skip the testing step. It’s the best way to ensure your handle is ready for use.
By giving the glue enough time to cure, I’ve been able to create knife handles that last for years. Trust me, patience pays off! 😊
Finishing Techniques for Round Knife Handles
Sanding Tips for a Smooth Finish
Sanding the scales is one of the most satisfying steps when finishing the handle. It’s where the rough edges disappear, and the handle starts to feel smooth and comfortable. I always cut sandpaper into strips and use a hardwood block as backing. This keeps the sanding even and prevents dips or uneven spots.
I start sanding at the ricasso and move toward the tip, using perpendicular strokes first. Once the surface looks uniform, I switch to parallel strokes for finer sanding. Changing the angle with each grit helps me spot old scratch lines and ensures they’re completely removed before moving to the next grit.
Here’s my grit progression:
Coarse grit (50) for shaping.
Medium grit (400-800) for pre-HT sanding.
Fine grit (up to 8000) for the final finish.
Wet sanding is my go-to for the last step. It gives the handle a brighter, shinier look. I test the smoothness by running my fingers over the surface. If it feels silky, I know it’s ready for polishing.
Tip: Don’t rush through grits. Take your time to remove all scratch lines before moving to finer sandpaper.
Polishing for a Professional Look
Polishing transforms a good handle into a great one. It’s all about achieving that mirror-like finish that makes the handle stand out. I use a polishing compound and a soft cloth to buff the surface. Working in small circles helps me cover every inch evenly.
For a consistent edge, I sharpen the knife at a 15-degree angle and apply a mirror polish bevel. This technique creates a smooth and professional finish. I’ve learned that skill matters more than grit level. A well-executed polish always outshines a rushed job.
Callout: Polishing isn’t just about looks—it improves the handle’s grip and durability too.
Applying Protective Coatings
Protective coatings are the final step in finishing the handle. They seal the surface and protect it from moisture, wear, and tear. I prefer using oil-based finishes like tung oil or Danish oil. They penetrate the wood and enhance its natural beauty.
Here’s how I apply the coating:
Clean the handle to remove dust.
Apply a thin layer of oil with a soft cloth.
Let it soak for 15 minutes, then wipe off excess.
Repeat the process for 3-5 coats, allowing each coat to dry completely.
For durability, I test the coating’s hardness and flexibility. A well-applied finish should resist scratches and maintain its shine over time.
Tip: Store the knife in a dry place to prolong the life of the protective coating.
Final Touches for Aesthetic Enhancement
When I finish shaping and sanding a knife handle, I like to add those little details that make it stand out. These final touches are where the handle truly comes to life. It’s not just about making it look good—it’s about creating something that feels special every time you hold it.
One of my favorite ways to enhance a handle is by adding decorative accents. For wooden handles, I sometimes use a wood-burning tool to create simple patterns or initials. It’s a small detail, but it adds a personal touch. If I’m working with stabilized wood or micarta, I might inlay a small piece of brass or mother-of-pearl. These materials catch the light beautifully and give the handle a unique flair.
Another trick I use is beveling the edges slightly. This softens the lines and makes the handle feel more comfortable in the hand. I do this with fine sandpaper, working slowly to avoid overdoing it. It’s a subtle change, but it makes a big difference in how the knife feels.
For a polished look, I sometimes apply a wax finish after oiling. The wax adds a soft sheen and provides extra protection. I buff it with a clean cloth until the handle gleams. This step is quick, but it makes the handle look professional and well-crafted.
Finally, I always inspect the handle under bright light. This helps me spot any tiny imperfections I might have missed. If I see anything, I fix it right away. Finishing the handle is all about patience and attention to detail. When I’m done, I know I’ve created something both beautiful and functional.
Pro Tip: Don’t skip the final inspection. It’s your chance to catch small flaws and make your handle truly shine.
Troubleshooting Common Handle-Making Issues

Fixing Misaligned Tang Slots
Misaligned tang slots can make a knife feel unstable and ruin its overall balance. I’ve dealt with this issue a few times, and it’s always best to catch it early. The first step is to define the problem clearly. Is the tang slot too wide, too narrow, or just off-center? Once I know the issue, I gather my tools—usually a chisel, file, and sandpaper—to make adjustments.
If the slot is slightly off, I use a file to widen it just enough for the tang to fit snugly. For larger misalignments, I fill the gap with epoxy mixed with fine sawdust. This creates a strong bond while keeping the handle secure. I always test the fit before gluing everything together. It’s a simple step, but it saves a lot of frustration later.
Tip: Document your adjustments. Keeping notes helps you avoid repeating the same mistakes in future projects.
Addressing Loose Pins and Fittings
Loose pins can make a knife handle feel wobbly, which is both annoying and unsafe. I’ve found that precision during construction is key to preventing this issue. When drilling pinholes, I make sure they’re slightly smaller than the pins for a tight fit.
If the pins still feel loose, I use a small amount of blue Loctite to secure them. It’s strong enough to hold the pins in place but allows for adjustments if needed. For more permanent fixes, red Loctite works wonders. I’ve also experimented with mechanical designs, like adding rivets, to improve stability. These methods have been game-changers for me.
Pro Tip: Always test the handle’s stability after securing the pins. A quick shake can reveal any remaining issues.
Repairing Surface Imperfections
Surface imperfections can ruin the look of an otherwise perfect knife handle. I’ve learned that the key to fixing these flaws is thorough preparation. First, I inspect the handle under bright light to spot scratches, dents, or uneven coatings.
For minor scratches, I use fine-grit sandpaper to smooth the surface. If the damage is deeper, I apply a thin layer of epoxy or wood filler, then sand it down once it’s dry. I also check the coating thickness to ensure it’s even. Tools like calipers or coating thickness gauges are great for this.
To test the durability of the repair, I perform a bend test. If the handle shows no cracks or peeling, I know the repair was successful. Keeping detailed notes on the materials and methods I use helps me refine my process over time.
Callout: Don’t skip adhesion tests when applying new coatings. They ensure the finish will last.
Preventing Common Mistakes
When I first started making knife handles, I made plenty of mistakes. Over time, I’ve learned how to avoid them, and I want to share these tips with you. Here are some common pitfalls and how to steer clear of them.
1. Skipping Proper Measurements
One of the biggest mistakes is rushing through measurements. A poorly measured handle won’t fit the tang properly, and that can ruin the entire project. I always double-check my measurements with a ruler or calipers. It’s a small step, but it saves so much frustration later.
Tip: Measure twice, cut once. It’s a classic rule for a reason!
2. Using the Wrong Tools
Using the wrong tools can lead to uneven shapes or damaged materials. I’ve learned that investing in quality tools makes a huge difference. For example, a dull saw blade can splinter wood, while a sharp one cuts cleanly. If you’re unsure about a tool, do a quick search or ask someone experienced.
3. Rushing the Sanding Process
Sanding might seem boring, but it’s essential for a smooth finish. I used to rush through it, only to end up with scratch marks on the handle. Now, I take my time and work through each grit carefully. It’s worth the effort when the handle feels silky smooth.
4. Ignoring Safety
Safety is non-negotiable. I’ve seen how easy it is to skip goggles or gloves, but it’s not worth the risk. Flying wood chips or dust can cause serious injuries. Always protect yourself.
Callout: Safety gear isn’t optional. It’s your best friend in the workshop.
5. Not Testing the Fit
Before gluing, I always test the handle’s fit. Skipping this step can lead to misaligned parts. A quick dry fit ensures everything lines up perfectly.
By avoiding these mistakes, you’ll save time and create better knife handles. Trust me, learning from experience makes all the difference! 😊
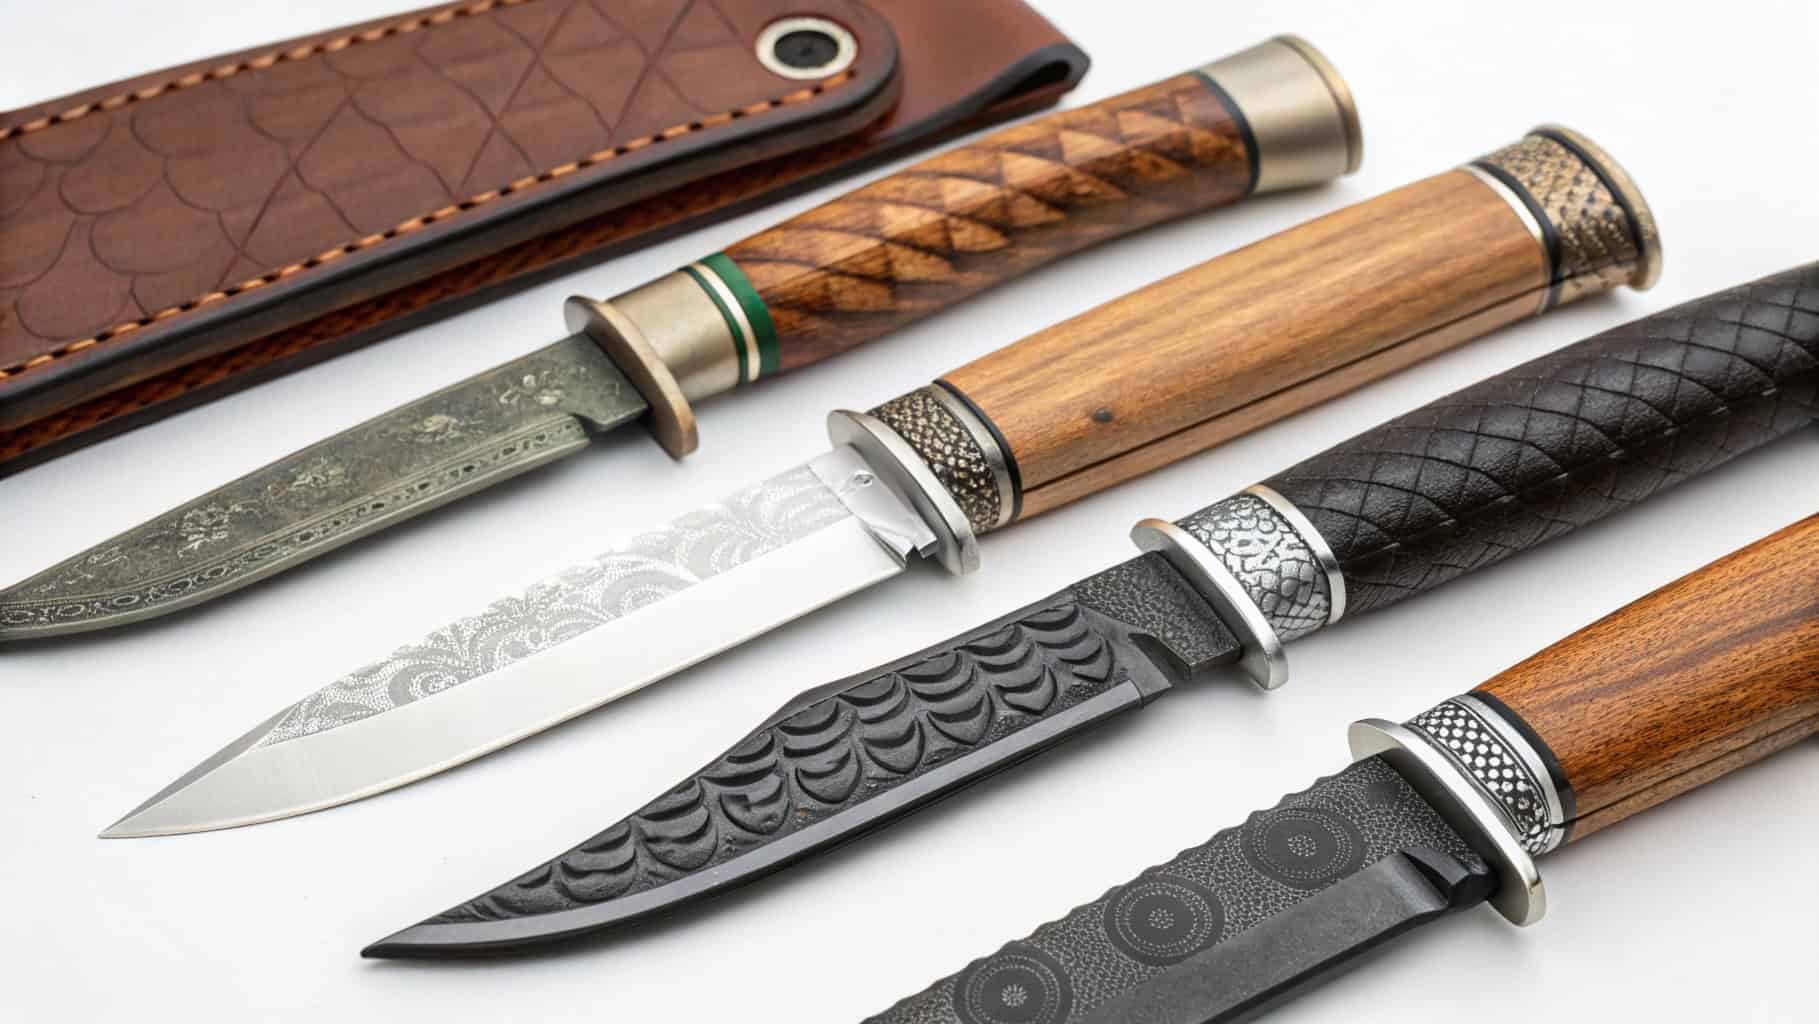
Customizing Knife Handles for Unique Designs
Adding Decorative Elements
Decorating a knife handle makes it look special. Small details can turn a plain handle into something amazing. I like using inlays such as brass, mother-of-pearl, or tiny gemstones. These materials shine beautifully and add elegance. For wooden handles, I sometimes carve designs or use a wood-burning tool. This adds a personal touch easily.
Mosaic pins are another great option. These pins have detailed patterns and can be the highlight of the handle. I’ve also tried mixing materials, like combining wood and resin, to create striking contrasts. These small additions make custom knife handles unique and memorable.
Tip: Start with simple decorations. Even small changes can stand out.
Experimenting with Different Materials
Picking the right material is important for a unique handle. Stabilized wood is one of my favorites because it’s strong and colorful. It’s great for handles that need to resist water. Micarta is another good choice. It’s lightweight, tough, and comes in cool patterns. For a modern style, I’ve used carbon fiber. It’s sleek and very durable.
Mixing materials can create exciting designs. For example, adding metal spacers to wood gives a classy look. I’ve noticed people love creative materials. Here’s a quick table of trends shaping knife handles:
Trend/Factor | Description |
|---|---|
Demand for Handcrafted Knives | People value unique, high-quality knives made by skilled makers. |
Customization Options | Buyers enjoy choosing blade materials, handle styles, and engravings. |
Shift Towards Sustainability | Locally sourced, eco-friendly knives are becoming more popular. |
Ergonomics and User Experience | Comfortable, easy-to-use designs attract more buyers. |
Innovative Materials | Durable, high-quality materials improve performance and appeal. |
These trends inspire me to try new ideas and improve my designs.
Personalization Techniques
Making a knife handle personal makes it extra special. A simple way is engraving initials or symbols. Laser engraving gives clean designs, while hand engraving feels more rustic. Another idea is shaping the handle to fit your hand perfectly. A custom fit looks good and feels better to use.
Adding color is another fun option. Dyes or resins can make wooden handles bright and colorful. I’ve also seen people embed items like coins or flowers into resin handles. This creates a design that tells a story.
Callout: Personalizing isn’t just about looks—it’s about making a handle that feels like part of you.
Making Handles for Different Purposes
When I make knife handles, I think about their use. A chef’s knife handle feels different from a hunting knife handle. Each knife has a job, and the handle should match it. Here’s how I design handles for specific needs.
1. Chef’s Knives
Chef’s knives need handles that are comfy and easy to control. These knives are used a lot, so the handle should stop hand pain. I like smooth, curved designs that fit the hand well. Stabilized wood or micarta are great materials because they resist water and clean easily. I also taper the handle near the blade for better grip during cutting.
Tip: Try the handle by pretending to chop or slice. It should feel steady and balanced.
2. Hunting Knives
Hunting knives need strong, non-slip handles. These knives are used outdoors, so I pick G10 or rubber grips. These materials work well in wet or muddy places. I add grooves or textures for better grip. A lanyard hole is helpful for hunters to attach the knife to their gear.
3. Utility Knives
Utility knives need simple, lightweight handles. I use materials like aluminum or carbon fiber. They are strong but don’t make the knife heavy. I also make sure the handle is easy to hold for quick, repeated tasks.
Callout: Always think about the knife’s job before picking materials or shapes. A good handle makes a big difference.
By designing handles for their purpose, I’ve made knives that work better and feel great. What kind of handle would you create? 😊
Maintaining and Caring for Knife Handles
Regular Cleaning Practices
Keeping your knife handle clean is simple but important. I always wipe the handle after each use with a damp cloth. This removes dirt, oils, and food particles that can build up over time. For wooden handles, I avoid soaking them in water. Instead, I use a mild soap solution and dry them immediately.
If the handle has stubborn stains, I use a soft-bristle brush to gently scrub the surface. For materials like micarta or stabilized wood, a little rubbing alcohol works wonders. It cleans without damaging the finish.
Tip: Don’t forget to clean the area where the handle meets the blade. Dirt can hide there and cause problems later.
Protecting Against Wear and Tear
Knife handles face a lot of wear, especially if you use them daily. To keep them looking great, I apply a protective oil or wax every few months. Tung oil is my favorite for wooden handles. It adds a layer of protection and enhances the natural beauty of the wood.
For synthetic materials like micarta or G10, I use a silicone-based spray. It keeps the surface smooth and prevents scratches. If the handle starts to feel rough, a quick sanding with fine-grit sandpaper can restore its smoothness.
Callout: Regular maintenance prevents cracks and keeps your handle durable for years.
Long-Term Storage Tips
Storing your knife properly is just as important as cleaning it. I always keep my knives in a dry place to avoid moisture damage. For wooden handles, I use a knife block or a sheath to protect them from scratches.
If you’re storing knives for a long time, add a thin layer of oil to the handle. This prevents drying and cracking. I also make sure the storage area has good airflow. Avoid sealed containers, as they can trap moisture and lead to mold.
Tip: Check your knife handles every few months during storage. A quick inspection can catch issues early.
Refreshing Worn Handles
Over time, even the best knife handles can start to look dull or feel worn. I’ve had a few handles that lost their shine or developed small cracks after years of use. Instead of replacing them, I’ve found ways to refresh and restore them. It’s easier than you might think, and it brings the handle back to life.
Step 1: Clean the Handle Thoroughly
The first thing I do is clean the handle. Dirt and grime can build up, especially on wooden handles. I use a damp cloth with mild soap to wipe it down. For stubborn spots, a soft-bristle toothbrush works wonders. If the handle is synthetic, rubbing alcohol can help remove stains without damaging the material.
Tip: Avoid soaking wooden handles in water. It can cause swelling or cracks.
Step 2: Sand Away Imperfections
Once the handle is clean, I check for scratches or rough spots. Fine-grit sandpaper (around 400-600 grit) is perfect for smoothing out the surface. I sand gently in the direction of the grain for wooden handles. For synthetic materials, I use circular motions to even out the surface.
Step 3: Apply a Fresh Finish
After sanding, I apply a new finish to protect the handle and make it look brand new. For wood, I love using tung oil or Danish oil. I rub a thin layer onto the handle, let it soak for a few minutes, and then wipe off the excess. For synthetic handles, a silicone-based spray adds a nice shine and protects against wear.
Callout: Always let the finish dry completely before using the knife again.
Refreshing a worn handle doesn’t take much time, but it makes a huge difference. It’s satisfying to see an old handle look and feel like new again. Give it a try—you’ll love the results! 😊
Understanding the Market for Knife Handles
Current Trends in Handle Design
Knife handle designs are changing fast. People now want handles that look good and work well. A popular choice is natural materials like stabilized wood or bone. These give knives a classic, handmade style that many love. At the same time, modern materials like carbon fiber and G10 are becoming favorites. They are strong and have a sleek, modern look.
Comfortable handles are also in demand. Ergonomic designs with rounded edges and textured grips are very popular. Buyers also enjoy customizing their handles. They like unique colors, patterns, or inlays that show their personality.
Tip: Check Instagram for new trends in knife handle designs.
Identifying Target Markets
Knowing who buys custom knife handles helps me design better. There are three main groups to focus on:
Chefs and Home Cooks: They need handles that are comfy and easy to clean.
Outdoor Enthusiasts: Hunters and campers want tough, non-slip handles for outdoor use.
Collectors: They love rare materials and artistic designs. They’ll pay more for unique handles.
Each group has different needs. Understanding these helps me make handles that stand out.
Leveraging Consumer Preferences
Listening to buyers helps me improve my designs. Many people want handles that are both pretty and practical. For example, they may like polished wood but also want it to resist water.
I also take feedback seriously. If someone says a handle feels slippery, I try textured finishes. Small changes like this can make a big difference.
Callout: Always ask customers for feedback. It helps you learn what works best.
Opportunities for Innovation
Creating new ideas for knife handles is exciting. It allows endless possibilities. Each time I make a handle, I think of ways to improve it. I want it to be more useful, unique, or creative. Here are some ideas that could change how we think about knife handles.
1. Sustainable Materials
Using eco-friendly materials is a great way to innovate. I’ve tried using reclaimed wood and biodegradable materials. These options look amazing and help reduce waste. Imagine making a handle that’s both stylish and good for the planet. That’s a win for everyone!
Tip: Find reclaimed wood locally. It adds charm and supports the environment.
2. Smart Handles
Technology can also improve knife handles. Some handles now have sensors to track grip pressure or temperature. These features could help chefs or outdoor users. I haven’t tried this yet, but it’s an exciting idea to explore.
3. Modular Designs
What if you could change parts of a handle? Modular handles could let users swap grips, materials, or weights. This would make knives more flexible for different tasks.
4. Artistic Collaborations
Working with artists could bring fresh ideas. Handles with carvings, resin art, or hand-painted designs would look amazing. These could turn knives into beautiful, functional art pieces.
Callout: Try new things! The best ideas often come from experimenting.
Innovation makes crafting fun and inspiring. Whether it’s new materials, tech, or designs, there’s always room to grow. What new ideas would you like to try? 😊
Enhancing Production Efficiency
Making the Handle-Making Process Faster
When I first made knife handles, I wasted time looking for tools. Organizing my workspace made things quicker and more fun. Here’s what helped me:
Keep Tools Nearby: I place cutting tools, sandpaper, and glue close by. This stops me from searching for them while working.
Work on Several Handles: Instead of one handle, I prepare many at once. Cutting, sanding, and drilling in groups saves time.
Use Patterns: Patterns are super helpful. They make sure all handles look the same. I draw the shape on each blank before cutting.
Tip: Plan your steps ahead. A clear plan keeps you focused and saves time.
Using Technology for Better Results
Technology has made handle-making easier for me. The right tools can do amazing things. CNC machines cut shapes perfectly and save effort. I use them for detailed designs or when I need exact matches.
Laser engravers are great too. They add cool patterns or logos to handles quickly. Digital calipers help me measure sizes fast and accurately.
Callout: Don’t be scared to try new tools. They might seem tricky, but they save time and improve your work.
Saving Materials and Money
I used to waste materials, which was annoying. Now, I’ve found ways to save both materials and money.
Use Leftovers: Small wood or resin pieces can be used for decorations. I never throw scraps away.
Plan Cuts Smartly: I draw shapes on blanks to use materials better. This reduces waste.
Buy in Bulk: Buying supplies like sandpaper and glue in large amounts costs less over time.
Pro Tip: Keep track of your spending. Knowing where your money goes helps you save more.
By working smarter, I’ve made handle-making quicker, cheaper, and more enjoyable. Try these tips—you’ll love the results! 😊
Scaling Production for Demand
When I started making knife handles, I worked on one handle at a time. It felt rewarding, but as demand grew, I realized I needed to speed things up without losing quality. Scaling production can feel overwhelming, but with the right approach, it’s manageable and even exciting.
1. Batch Processing Saves Time
One of the first changes I made was working in batches. Instead of cutting, sanding, and finishing one handle at a time, I grouped similar tasks. For example, I’d cut all the blanks for the week in one session. Then, I’d move on to drilling or shaping. This method reduced setup time and kept me focused on one task at a time.
Tip: Group tasks by tools. Switching tools too often wastes time and energy.
2. Invest in Efficient Tools
Upgrading tools made a huge difference. A belt sander sped up shaping, and a drill press made pinholes more precise. If you’re serious about scaling, consider a CNC machine. It’s a big investment, but it can handle repetitive tasks with incredible accuracy.
Callout: Don’t forget to maintain your tools. Sharp blades and clean machines work faster and last longer.
3. Streamline Your Workflow
I reorganized my workspace to make production smoother. Tools and materials are now within arm’s reach. I also labeled storage bins for quick access. These small changes saved me hours over time.
Scaling production doesn’t mean sacrificing quality. With batch processing, better tools, and an efficient setup, you can meet demand while keeping your work top-notch. What’s your favorite way to save time in the workshop? 😊
Marketing and Selling Knife Handles
Highlighting Unique Selling Points
When I promote my knife handles, I focus on what makes them special. Each handle has a unique story, like its material or design. I explain these details to show why my handles are different. For example, stabilized wood is tough, and carbon fiber looks modern. People enjoy knowing their handle is both useful and one-of-a-kind.
I also talk about how comfortable my handles feel. A good handle fits naturally in your hand. This makes it easy to use for cooking or outdoor tasks. Sharing these features helps me connect with buyers who want quality and comfort.
Tip: Share what makes your handles stand out. Buyers love details.
Building Brand Recognition
Creating a brand takes time but helps people remember your work. I started with a simple logo that matches my style. I put it on every handle I make so people know it’s mine. Sharing photos and videos of my workshop online shows the care I put into each handle.
Happy customers often tell their friends about my handles. I always follow up with buyers and ask for feedback. Good reviews build trust and make my brand stronger.
Callout: A brand is more than a logo. It’s about how people feel about your work.
Effective Online and Offline Strategies
Selling online has helped me reach more people. I use sites like Instagram and Etsy to show my handles. Clear photos are important. I take close-up pictures to show the texture and design. Writing simple descriptions helps buyers understand the product better.
Offline, I go to craft fairs and local markets. Meeting people face-to-face lets me share my love for knife-making. I bring samples so they can touch and see the quality. These events help me find new customers and make connections.
Pro Tip: Use both online and offline methods. Together, they reach more people.
Working with B2B Clients
Collaborating with B2B clients has been a rewarding experience. These clients include knife makers, shops, and culinary schools. They need handles that are reliable and high-quality. Building trust with them takes time, but it’s worth the effort. Here’s what I’ve learned.
1. Learn What They Need
Start by asking questions. Each client has unique needs. Some want large orders with matching designs. Others prefer custom, one-of-a-kind handles. I ask things like:
What materials do you like?
How many handles are needed?
When do you need them finished?
Listening carefully shows I care about their goals. It also helps me deliver exactly what they want.
Tip: Use a notebook or app to track client preferences. It keeps you organized and professional.
2. Provide Samples
Samples make a big difference. When meeting new clients, I bring finished handles for them to see. Feeling the quality builds trust. For clients far away, I mail sample packages. This small step often leads to bigger orders.
3. Stay Clear in Communication
Good communication is very important. I update clients on their orders, like when they’ll ship or if there’s a delay. Being honest and clear builds trust and keeps them happy.
Callout: Reply to emails or calls quickly. It shows respect and professionalism.
4. Focus on Long-Term Partnerships
Clients value consistency. I always aim to deliver great handles on time. This keeps them coming back for more orders. Many of my clients trust me because I’ve proven I’m reliable.
Working with B2B clients isn’t just about selling handles. It’s about creating strong partnerships. When you meet their needs and deliver quality, they’ll stay loyal. 😊
Making a round knife handle is a fun experience. Picking materials, shaping, and finishing each step feels special. Trying out new designs and materials makes it even better. Whether it’s for a chef’s knife or a utility knife, creating something useful and nice-looking feels amazing. Why not try it yourself? Make a handle that shows your creativity and enjoy using something you made. 😊
FAQ
What’s the best material for a knife handle?
Stabilized wood is strong and looks great. It resists water and lasts long. Micarta is another good choice. It’s light and very durable. For a sleek style, carbon fiber is excellent.
Tip: Pick materials based on how the knife will be used.
How do I fix a loose handle?
I use epoxy or Loctite to secure loose handles. Adding pins or rivets makes them stronger. Testing the fit before gluing avoids problems later.
Callout: Clean the tang well before using any adhesive.
Can I make knife handles without fancy tools?
Yes! I started with simple tools like files and sandpaper. You don’t need expensive machines to make nice handles.
Basic Tools:
Rasp
Clamps
Chisel
How long does it take to make a knife handle?
It depends on the design. Easy handles take a few hours. Detailed ones might take a day or two. Always let glue and finishes dry fully.
Pro Tip: Take your time for the best results.
Can I customize handles for gifts?
Of course! Adding engravings or special materials makes great gifts. I’ve made handles with initials and patterns for friends.
Emoji: 🎁 Custom handles are thoughtful and unique presents!