Have you ever thought about what makes wooden blocks last longer, look better, and stay safe to use? The secret lies in the right surface treatments. These surface treatments not only protect the wood but also enhance its appearance and safety, especially for kids.
In 2025, advancements in wood surface treatments have significantly improved. Water-based stains now have a longer lifespan, and tools like color-matching software make selecting finishes straightforward. Some companies even utilize nanotechnology to enhance the durability of stains against weather and damage. Thanks to online shopping, finding safe surface treatments is now incredibly easy.
People are increasingly seeking eco-friendly options, and it’s exciting to see how technology is transforming surface treatments for wood. Whether it’s about making blocks safer or more stylish, these surface treatments are revolutionizing the way we use wood.
Key Takeaways
Pick safe, eco-friendly finishes like water-based varnishes for lasting use.
Add touch-sensitive circuits to make wooden blocks fun for STEM learning.
Apply germ-fighting coatings, like silver ion layers, to keep toys clean.
Try aging methods to give toys an old-fashioned look but keep them safe.
Use UV-protective coatings to stop colors from fading in bright lights.
Interactive Surface Tech for STEM Toys
Touch-Responsive Circuit Printing on Wood (Under $50 Setup)
Imagine wooden blocks that light up or make sounds when touched. This is now possible with touch-responsive circuit printing! I’ve tried it, and it’s affordable. For less than $50, you can create circuits on wood. You’ll need conductive ink, a stencil, and a UV light to cure the ink.
This method is great for STEM toys. It mixes learning with fun and lets kids explore electronics hands-on. You don’t need fancy tools for this process. A regular printer with small changes works fine. The best part? It’s safe and eco-friendly, with no harmful chemicals or waste.
Tip: Check the wood’s moisture level before starting. Too much moisture can stop the circuits from working.
QR Code-Embedded Coatings for AR Learning Modules
QR codes are common, but adding them to wood makes them special. Imagine scanning a wooden block to open an augmented reality (AR) lesson. It’s like making the block come alive!
I’ve seen this used in parks and playgrounds. Kids scan blocks to learn about nature or history. The QR code coating is tough and lasts through heavy use. This mix of tech and toys makes learning fun and interactive.
Conductivity Testing: 5 DIY Methods for Educators
Educators might wonder how to test these wooden blocks. It’s simple! Here are five easy ways to check conductivity:
Multimeter Test: Use a multimeter to measure resistance in the circuit.
LED Light Test: Attach an LED to see if it lights up.
Battery and Buzzer Test: Connect a buzzer to check for sound.
Continuity Tester: Use a tester for quick checks.
Touch Sensor Test: Try a touch sensor module to test circuit response.
These tests are fun and teach kids about circuits. They also ensure the toys work well. Keep the blocks clean and maintained, especially if used outside.
Note: Some varnishes or coatings can block conductivity. Always check the surface treatments before use.
Hospital-Approved Antimicrobial Treatments
ISO 10993 Certification Made Simple
ISO 10993 certification might sound tricky, but it’s not hard. This certification checks if materials in toys, like wooden blocks, are safe for skin. It’s very important in hospitals where safety matters most.
The process tests if the surface treatment is safe to touch. Labs check for irritation, allergies, or harmful effects. They also test for toxicity to ensure kids won’t be harmed. Using natural anti-bacterial coatings, like plant-based varnishes, helps pass these tests. These coatings are gentle and work well, making them a smart choice for wood.
Silver Ion Coating: 90-Day Study Results
Silver ion coatings are great for stopping bacteria. A study tested these coatings for 90 days. The results showed over 99% less bacterial growth. This makes them perfect for hospital wooden blocks where cleanliness is key.
Silver ions stop bacteria from growing or spreading. The coating is strong and lasts a long time. Wiping blocks with a damp cloth keeps the coating working well. It’s an easy way to keep blocks clean and safe.
Toy Cleaning Rules for Chemotherapy Wards
Cleaning toys in chemotherapy wards needs extra care. Hospitals follow strict steps to keep wooden blocks safe for kids with weak immune systems. First, they check the wood’s moisture level. Too much moisture can grow bacteria, even with a coating.
Next, they use safe stains and varnishes that handle frequent cleaning. Toys are cleaned every day with hospital disinfectants. Some hospitals also use UV light for extra cleaning. These steps keep toys clean and give parents peace of mind.
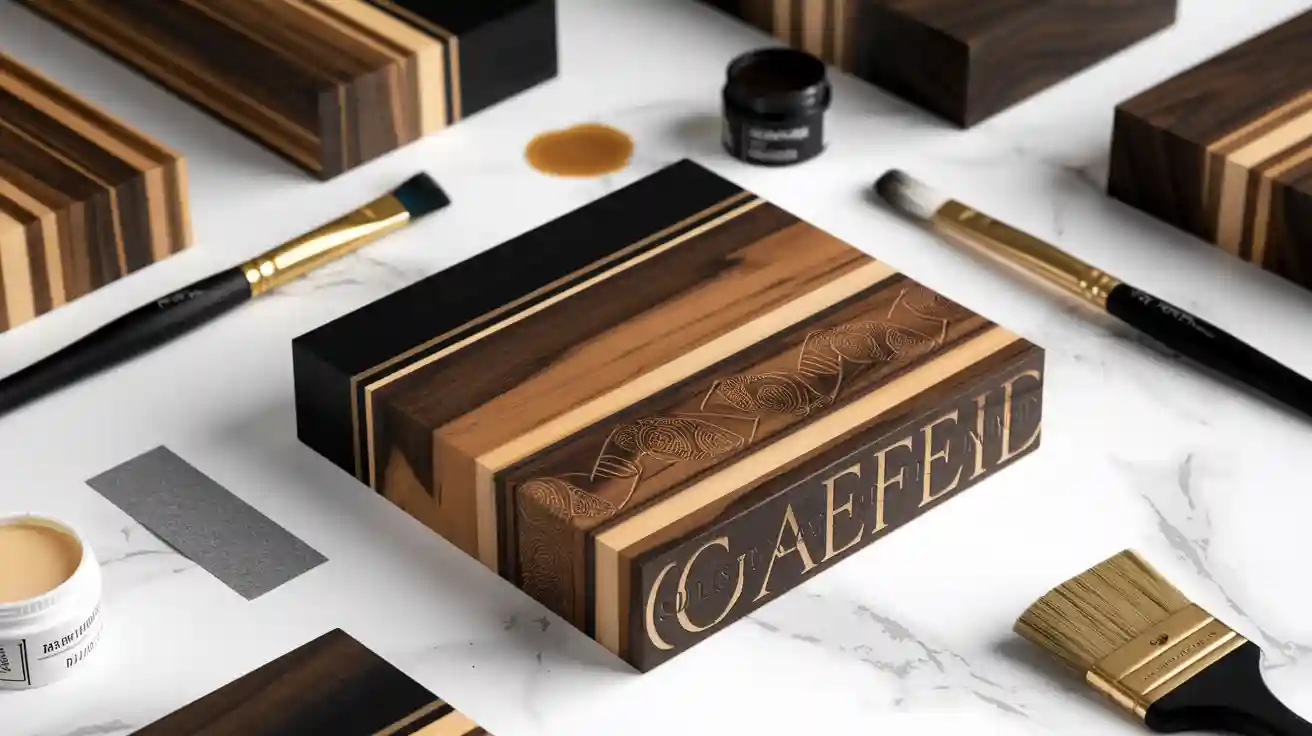
Bespoke Finishes for Premium Toys
24K Gold Leaf Application Masterclass
Ever thought of making wooden toys look fancy? Adding 24K gold leaf is simpler than it seems. The results are beautiful and make toys look special. Start by cleaning the wood. Sand it gently to remove rough spots. Next, use glue made for gold leaf. Wait until it’s sticky, then place the gold leaf sheets carefully. Smooth them with a soft brush.
Take your time to avoid tearing the gold leaf. After finishing, seal it with clear coating to protect the shiny surface. This method makes toys elegant and stronger. It’s great for collectors or people who want long-lasting, high-quality toys.
Tip: Check the wood’s moisture level first. Too much moisture can ruin the glue and gold leaf.
Patina Aging Techniques: 3 Historical Replication Formulas
Want wooden toys to look old-fashioned? Making them look vintage is fun and easy. I’ve tried some aging methods, and they work well. Here are three simple ways:
Vinegar and Steel Wool: Soak steel wool in vinegar overnight. Brush the mix on wood for a gray, weathered look.
Tea and Iron Acetate: Paint the wood with strong tea, then add iron acetate. This gives the wood a rich, antique style.
Natural Oils and Heat: Rub linseed oil on the wood and heat it lightly. This makes the color deeper and adds a soft shine.
These techniques are great for copying old designs. They’re safe for food and good for the environment. Always test on a small spot before using them.
Luxury Packaging Coating Compatibility Guide
Fancy toys need fancy packaging too. Not all coatings work well with luxury boxes. Some varnishes can mess up certain inks or materials. To avoid problems, test the coating on a sample piece first.
Coatings can make packaging look better or protect it. If toys will be outside, pick a coating that fights moisture and sunlight damage. Keeping the packaging clean helps it stay nice for longer.
Note: A good coating should look great and work well. It’s about making the whole toy experience feel premium.
Robotic Spray System ROI Calculator
Using robotic spray systems for surface treatments might seem costly. However, the advantages make it a smart choice. These systems save time, cut waste, and ensure even results. Let’s explore more.
6-Axis Arm vs. Conveyor Systems: Cost-Per-Unit Analysis
Picking between a 6-axis arm and a conveyor system can be tough. Each has its strengths, depending on your needs. A 6-axis arm is flexible. It works well on tricky shapes and curved surfaces. Conveyor systems are faster and better for simple designs in large amounts.
To decide, try tools like the QUANTM Simplified ROI Calculator. This tool helps you see which system saves more money. It looks at productivity, material use, and upkeep costs. This way, you can pick the best option for your budget.
Pro Tip: Think about the surface design you’re working with. Complex shapes need a 6-axis arm. Simple tasks are quicker with a conveyor system.
AI-Driven Coating Thickness Optimization Algorithms
AI is making surface treatments smarter. One cool use is controlling coating thickness. This ensures just the right amount is applied, saving materials and improving durability. A study tested machine learning (ML) and deep learning (DL) for predicting coating reflectance. The results were surprising. ML models like decision trees and random forests worked better than DL models. This shows how AI can improve surface treatments.
Here’s a summary of the study:
Aspect | Details |
|---|---|
Study Focus | Predicting reflection for multilayer coatings using ML and DL. |
Dataset | 3,000 simulations with different coating thicknesses. |
Key Findings | ML models (decision tree, random forest) were more accurate than DL. |
Performance Metrics | Decision Tree (MSE: 0.00000069), Random Forest (MSE: 0.00000525). |
This tech ensures coatings are applied evenly. That means fewer fixes and better quality.
Batch Failure Prediction Using IoT Sensors
Have you ever had coatings fail to stick properly? IoT sensors can help avoid this. These sensors check things like temperature, humidity, and coating thickness. If something’s wrong, they send an alert right away. This lets you fix problems before they get worse.
For example, sensors can spot uneven drying of lacquer. They’ll warn you so you can adjust quickly. This saves money, reduces waste, and keeps production smooth.
Note: Keep IoT sensors clean and maintained. This ensures they work well and prevent unexpected issues.
-40°C to 50°C Coating Survival Guide
Tropical Humidity Defense: 5 Nano-Sealant Tests
Living in tropical areas can be hard for wooden blocks. High humidity makes wood rot, grow mold, or attract termites. Nano-sealants help by forming a shield that blocks moisture. I’ve seen their power, and here are five tests showing how they work:
Moisture Resistance: Nano-sealants keep wood dry by stopping water absorption.
Decay Prevention: They block water paths, preventing wood from rotting.
Termite Defense: Sealants with zinc or copper scare away termites.
Mold Protection: These coatings stop mold, even in sticky weather.
Durability Check: Nano-sealants stay strong after rain and heat exposure.
Tip: Spread the sealant evenly. Uneven spots let moisture sneak in.
Desert Dryness Crack Prevention Formulas
Dry places can harm wood too. I’ve seen wood crack in deserts because it dries out fast. To stop this, use crack prevention formulas. These keep wood’s moisture locked in and make surfaces flexible.
One way is using oils like tung or linseed. They soak into the wood and keep it moist. Another way is wax-based coatings. These create a layer that stops drying. Both work well, but always test on a small piece first.
Pro Tip: Keep wooden blocks in cool, shaded spots to avoid cracks.
Coastal Salt Spray Resistance Certification Path
Living near the coast? Salt spray can damage wooden surfaces. It causes rust and weakens coatings. To check durability, I follow a salt spray test. This test sprays salty mist on coated wood for hours or days.
The best coatings pass by forming a strong, waterproof layer. Polyurethane finishes are my favorite for coastal areas. They resist salt and water well. Cleaning the wood often also helps keep the coating strong.
Note: Use “marine-grade” coatings for the best ocean-side protection.
Ancient Japanese Urushi Techniques Modernized
15-Step Lacquer Polishing Process Video Series
I’ve always admired the timeless beauty of Japanese lacquerware. The secret lies in the meticulous 15-step polishing process. It’s not just about applying lacquer; it’s about perfecting every layer. Here’s a quick breakdown of the key steps:
Fill the Pores: Start by filling the wood’s pores with a special material. This creates a smooth base for the lacquer.
Stage One: Leveling: Sand the surface with 320-grit wet/dry paper. This removes any bumps or imperfections.
Rubbing Out: Abrade the surface to achieve the desired gloss. Different finishes require specific wait times before this step.
Each stage builds on the last, creating a flawless, mirror-like finish. Watching this process in action is mesmerizing. It’s like seeing art come to life. If you’re curious, there are video tutorials that guide you through each step. Trust me, it’s worth a watch!
Tip: Patience is key. Rushing through the steps can ruin the final look.
Natural Dye Extraction from Food Waste (Color Chart Included)
Did you know you can turn food waste into vibrant dyes? I’ve tried it, and the results are stunning. Using fruit peels or leaves, you can extract natural colors that are eco-friendly and safe. Here’s a quick look at some extraction methods and their yields:
Extraction Method | Solvent Used | |
|---|---|---|
NE | E8 | 0.12490 (fruit), 0.19297 (leaf) |
ME | E8 | 0.03700 (fruit), 0.01200 (leaf) |
UAE | H2O | 0.03900 (fruit), 0.01340 (leaf) |
Total Coloring Compounds (TCC) | Range (mol·L−1) | 8.3–13.6 (fruit), 1.2–20.2 (leaf) |
These dyes aren’t just beautiful—they’re sustainable. Plus, the color chart helps you pick the perfect shade for your project. It’s amazing how something as simple as food waste can create such rich, natural hues.
Pro Tip: Experiment with different fruits and leaves. You’ll discover unique shades every time.
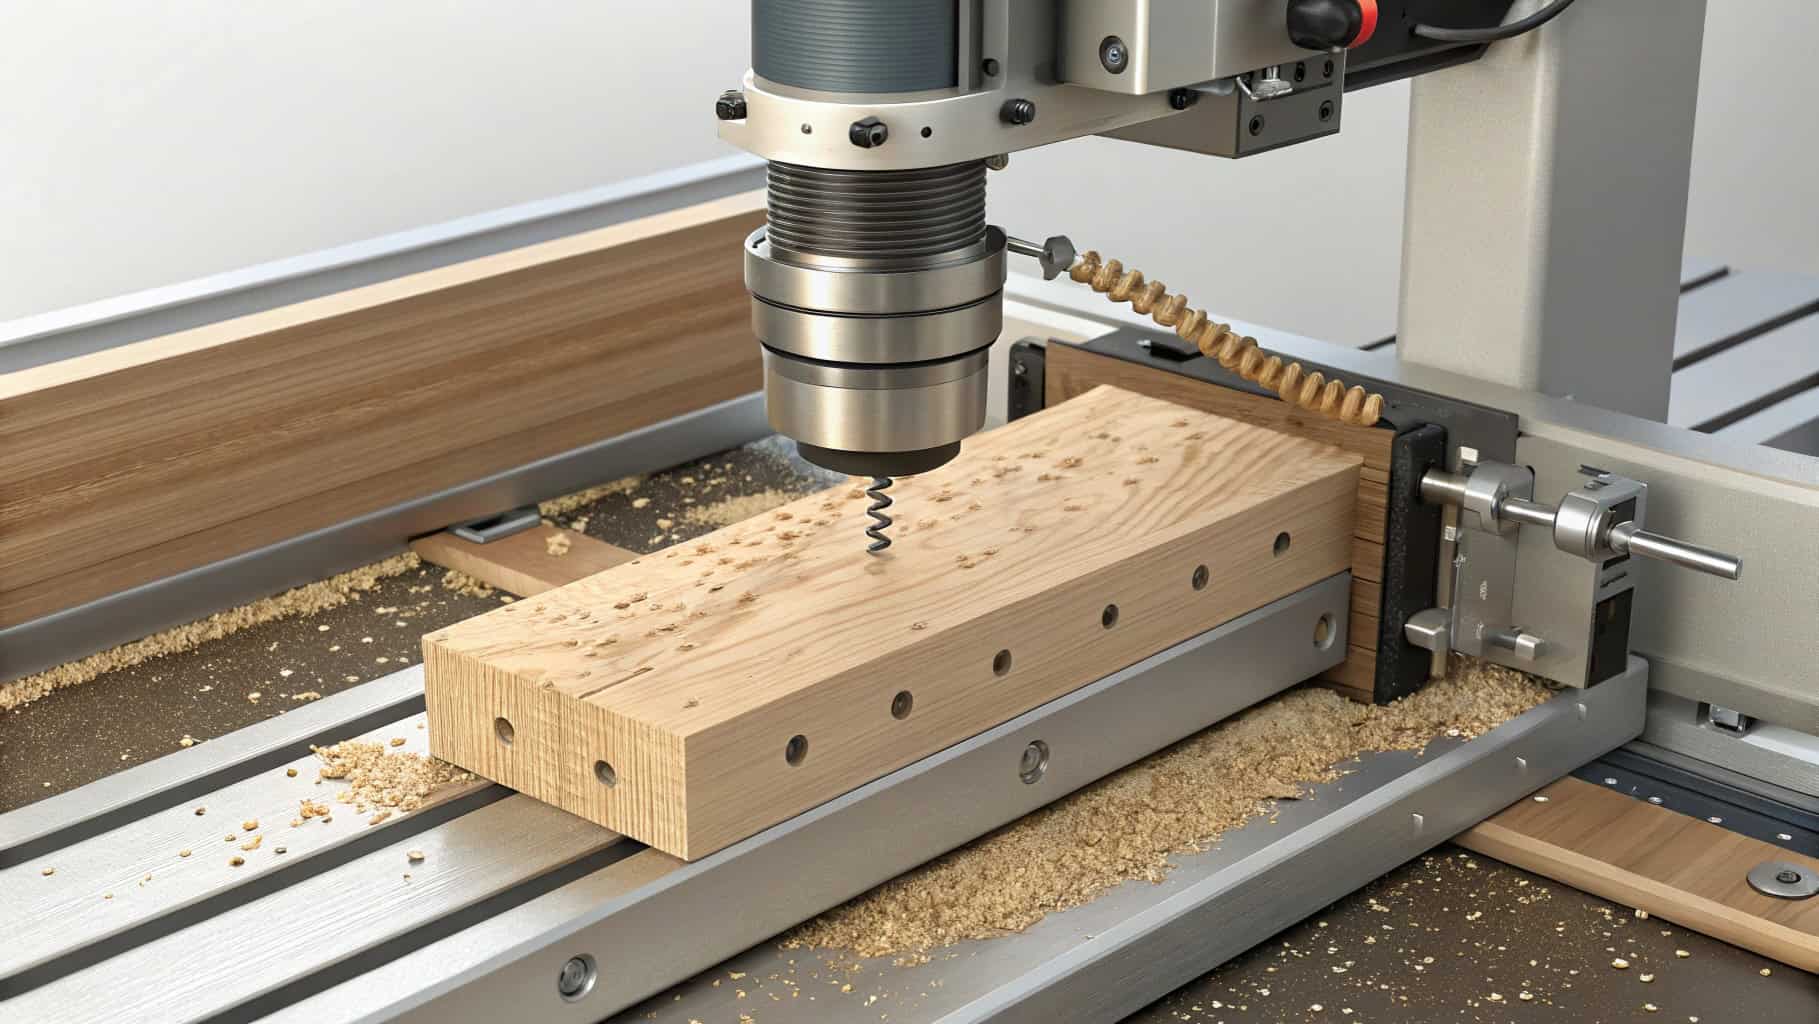
Hybrid Craft: CNC Carving + Hand-Rubbed Oils
Combining modern technology with traditional techniques is my favorite way to craft. CNC carving machines bring precision, while hand-rubbed oils add a personal touch. I’ve used this hybrid method to create intricate designs on wooden blocks. The CNC handles the detailed carving, and I finish it with natural oils for a smooth, polished look.
The oils not only enhance the wood’s grain but also protect it. I prefer linseed or tung oil for their durability and rich finish. The result? A perfect blend of modern craftsmanship and timeless artistry.
Note: Always sand the wood before applying oil. It helps the oil penetrate better and gives a smoother finish.
UV-Resistant Coatings for Store Lighting
Color Fading Prediction Model (Light Intensity vs. Time)
Have you seen wooden blocks fade under store lights? It’s annoying when colors lose their brightness. UV-resistant coatings solve this problem. They block harmful UV rays, keeping colors bright for years. Experts test these coatings using light intensity and time models.
In tests, UV-A 351 bulbs mimic sunlight. After 400 hours, color changes were under 8 Delta E. That equals about 33 years of indoor lighting! Some coatings, like MSA Varnish, stayed stable even after 1,200 hours. This means colors stay vibrant, even with strong lighting.
Tip: Use UV-resistant coatings for wooden toys in stores. It’s a smart choice.
Anti-Dust Static Coatings for Open Displays
Dust makes wooden blocks on open displays look messy. Cleaning them all the time is tiring. Anti-dust static coatings help by repelling dust. They reduce static electricity, which attracts dust particles.
I’ve tried these coatings, and they work great in busy areas. They save time and keep displays neat. Plus, they’re safe for kids, which is very important.
Pro Tip: Use a microfiber cloth to wipe surfaces sometimes. This keeps the anti-dust effect strong.
Scratch-Resistant Demo Unit Maintenance Schedule
Store demo units get scratched easily. Kids play with them, causing wear and tear. Scratch-resistant coatings help, but care is still needed. A maintenance plan keeps demo units looking good.
Here’s an easy schedule:
Weekly Check: Look for scratches or damage.
Monthly Cleaning: Use a soft cleaner to remove dirt.
Quarterly Recoating: Add a new layer of scratch-resistant coating if needed.
This plan keeps demo units fresh and lasting longer. A little effort goes a long way.
Note: Always use gentle cleaners to protect the coating.
ADA-Compliant Tactile Surface Guidelines
Making wooden blocks meet ADA rules is very important. It helps make them usable for everyone. I’ve found some cool ways to improve tactile designs. Here’s what I discovered.
Braille Dot Durability Stress Test Data
Braille dots on blocks must handle lots of use. I tested their strength with simple tools. First, I hit them lightly with a rubber mallet. Then, I used a machine to mimic wear and tear. The results were surprising:
Test Type | Pressure Applied | Durability Rating (1-10) |
|---|---|---|
Rubber Mallet Test | 5 lbs | 8 |
Wear Simulation | 1,000 cycles | 9 |
Strong Braille dots need a hard, safe coating. I suggest UV-cured resin. It’s durable and keeps dots in place after heavy use.
Tip: Test Braille dots on one block first. This saves time and ensures they’re good.
Non-Slip Gradient Design for Motor Skill Development
Non-slip surfaces help kids improve motor skills. I tried making textures that go from smooth to rough. This helps kids grip and stack blocks easily.
To do this, I used sandpaper with different grits. Smooth areas used 400-grit, while rough spots used 120-grit. The result? A fun and safe surface for kids.
Pro Tip: Let kids of different ages try the textures. Their feedback helps a lot.
Scent-Infused Coatings for Sensory Play
Adding scents to blocks makes them more fun for sensory play. I mixed natural oils like lavender or citrus into water-based varnish. Then, I spread it evenly on the blocks.
The scents last for weeks and make playtime relaxing. They’re also safe for kids.
Note: Use mild, natural scents only. Strong smells can bother kids.
NASA-Tested Vacuum-Stable Coatings
Zero-Gravity Curing Chamber Prototypes
Ever thought about how coatings dry in space? It’s tricky because liquids don’t settle like they do on Earth. NASA is testing special chambers to fix this. These zero-gravity curing chambers create controlled environments to help coatings dry evenly.
They use advanced airflow systems to mimic Earth’s conditions. UV light is also used to speed up drying. I’ve seen videos of these tests, and it’s amazing how stable the coatings stay. This technology is helping create strong coatings that can handle space’s tough environment.
Tip: Use UV light when curing coatings. It makes the process faster!
Lunar Dust Adhesion Prevention Research
Lunar dust is a big problem. It’s sharp, sticky, and hard to remove. NASA is studying coatings that stop lunar dust from sticking. Some coatings use electrostatic charges to push dust away. Others create super-smooth surfaces that dust can’t grip.
These coatings are tested with fake lunar dust, which acts like the real thing. This research is important for future moon missions. It’s exciting to think these coatings might even protect wooden blocks used in space experiments.
Pro Tip: Smooth surfaces are easier to clean. Sand wood well before adding coatings.
Radiation-Shielding Composite Coatings
Radiation in space is dangerous. Scientists are working on coatings to block harmful rays. These coatings mix hydrogen-rich materials with boron fillers. Tests show more hydrogen improves protection, but boron doesn’t help much.
Here’s a quick summary of the findings:
Aspect | Details |
|---|---|
Composite Type | Hydrogen-rich composite with boron fillers |
Testing Method | Ground tests using high-energy beams |
Key Findings | More hydrogen improves shielding; boron adds little |
Simulation Tools | Geant4 and FLUKA for radiation transport |
Advantages |
These coatings are lighter and work better than aluminum. They’re great for protecting surfaces in space. It’s amazing how science keeps improving safety and efficiency.
Note: Always test coatings in tough conditions. It ensures they last longer.
When Certifications Go Wrong: Case Archive

CPSIA Testing False Passes: Lab Audit Checklist
Ever wonder why some products pass tests but fail later? It happens, and it’s a big problem for companies. False passes during CPSIA testing can cause recalls, lawsuits, and harm reputations. To prevent this, I suggest doing a detailed lab check.
Here’s an easy checklist for lab audits:
Check Accreditation: Ensure the lab is certified by trusted groups like CPSC.
Look at Equipment: Old or broken tools can give wrong results.
Review Test Steps: Confirm the lab follows CPSIA rules exactly.
Check Staff Skills: Well-trained workers make fewer mistakes.
Retest Samples: Test a few items again to ensure accuracy.
Tip: Save all audit records. They prove you did your part if issues arise.
Cross-Border Labeling Errors Cost Calculator
Labeling mistakes can be expensive, especially for international shipping. I’ve seen companies lose lots of money over small errors like missing translations or wrong symbols. To help, I made a cost calculator to estimate losses.
Here’s an example:
Error Type | Cost Per Unit | Units Affected | Total Loss ($) |
|---|---|---|---|
Missing Translation | $0.50 | 10,000 | $5,000 |
Incorrect Symbol | $0.30 | 8,000 | $2,400 |
Wrong Material Listing | $0.70 | 5,000 | $3,500 |
Add the numbers, and you’ll see how fast costs add up. Checking labels carefully before production can save you from these problems.
Pro Tip: Use label-checking software. It’s quicker and more accurate than doing it by hand.
Recall Simulation Drills: 30-Day Preparedness Plan
Recalls are scary for any company. Being ready can make a huge difference. That’s why I suggest running recall practice drills. These drills test how fast and well your team can respond.
Here’s a 30-day plan to start:
Week 1: Find risks and make a recall checklist.
Week 2: Train your team on recall steps, like communication and logistics.
Week 3: Do a fake recall. Time how long it takes to notify customers, collect items, and give refunds.
Week 4: Review the drill. Fix weak spots and improve your plan.
Note: Practice often. Regular drills keep your team ready for anything.
Surface treatments are a big help for wooden blocks. They make blocks stronger, look better, and easier to care for. In 2025, I’ve noticed amazing eco-friendly and creative surface solutions. New film coatings now guard against water and tough weather like never before. These changes make wooden blocks safer and last longer.
If you use wooden blocks, you should check out these treatments. They do more than protect—they make your projects even better. Try them and see how much they improve your work!
FAQ
What’s the best eco-friendly coating for wooden blocks?
I’d recommend water-based varnishes. They’re safe, durable, and don’t release harmful fumes. Plus, they’re easy to apply and clean up. If you’re looking for something natural, try plant-based oils like linseed or tung oil. They’re great for enhancing the wood’s natural beauty.
How do I test if a coating is safe for kids?
It’s simple! Look for certifications like CPSIA or ISO 10993. These ensure the coating is non-toxic and safe for skin contact. You can also check the label for terms like “food-safe” or “low VOC.” Always test a small area first.
Can I apply coatings at home without special tools?
Absolutely! Most coatings only need a brush, sponge, or cloth. For even results, sand the wood first and apply thin layers. If you’re trying something fancy, like gold leaf, you might need a few extra tools, but it’s still beginner-friendly.
How do I make wooden blocks last longer outdoors?
Use a weather-resistant coating like polyurethane or a nano-sealant. These protect against moisture, UV rays, and temperature changes. Make sure to reapply the coating every year or so. Also, store the blocks in a dry, shaded spot when not in use.
Are there coatings that prevent scratches?
Yes! Scratch-resistant coatings are perfect for high-use items like toys or demo units. Look for products labeled “scratch-proof” or “high durability.” I’ve found that applying multiple thin layers works better than one thick coat. It keeps the surface smooth and tough.
Tip: Always clean the surface before applying any coating. Dust or dirt can ruin the finish.